How to Use
- Screen configuration
-


How to use each Screen
- Library
-
Library :
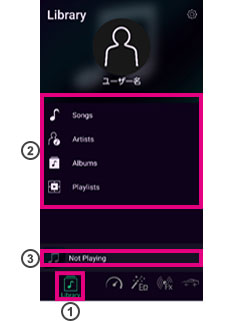
Library button
Tap to open the library screen.Selection options
Select a Song, Artist, or Playlist.Current selection view
Shows the music currently playing.Song control screen
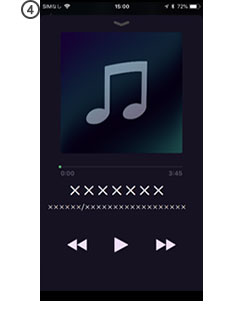 Control the music playing.Library :Settings button
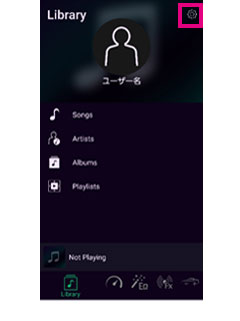

Car audio products
Tap to open the Pioneer products page.FAQ
Tap to open the FAQ page.Send diagnostic information
( Unavailable at this time )License Agreement
Tap to open the license agreement.Disclaimer
Tap to open the disclaimer notes.Privacy policy
Tap to open the privacy policy. - Super "Todoroki"
-
Super "Todoroki" sound :Emphasizing power and aggression.
*Super "Todoroki" sound is effective only in smartphone mode and car stereo mode.
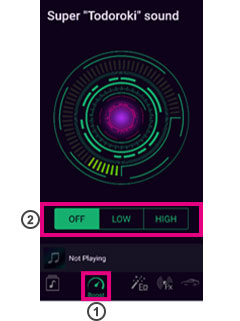
Boost button
Tap to open the Super "Todoroki" sound screen.Boost level selections
Select desired boost level. - EQ
-
EQ :Set an equalizer curve
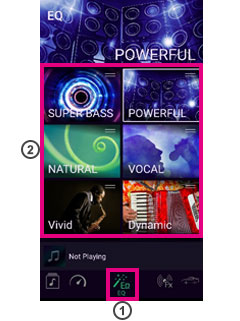
EQ button
Tap to open the EQ settings screen.Preset EQ selections
Select desired preset EQ.
Custom EQ settings
Select your custom EQ.Edit button
Tap to open the custom EQ edit screen.Custom EQ edit screen
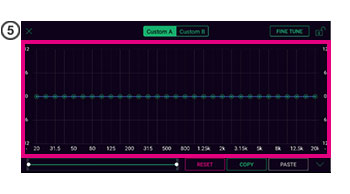
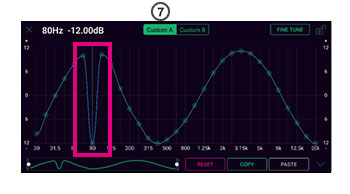
Custom area
Draw the EQ curve with your finger to edit.

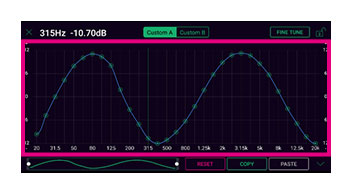
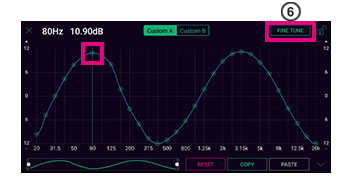
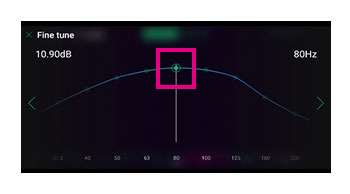
Fine tune button
Select specific points to fine tune.

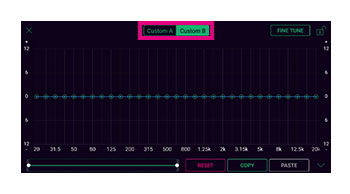
Custom A and B Selection Buttons
Tap to switch between Custom A and Custom B.

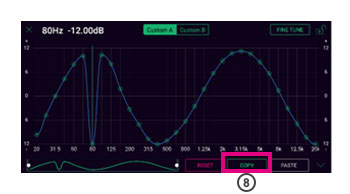
Copy button
Tap to copy EQ curve.


Paste button
Tap to paste EQ curve.

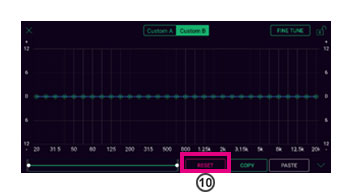
Reset button
Tap to reset the EQ curve.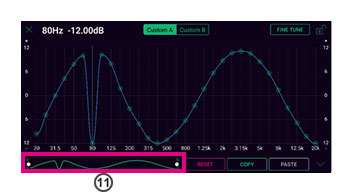
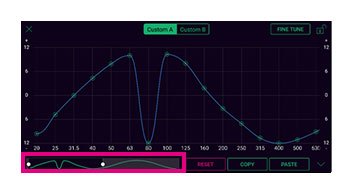
Display area selector
Slide to select display area.

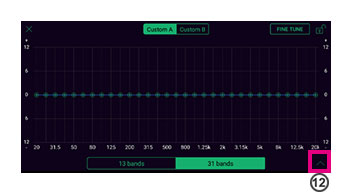
EQ band screen
Tap to display EQ band.

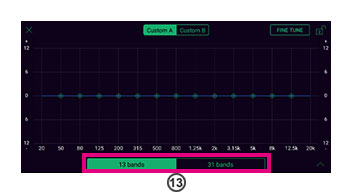
Select EQ band
Select EQ band. - Live Simulation
-
Live Simulation :Simulate the sound of live venues and concert halls
*Live Simulation is effective only in smartphone mode and car stereo mode.
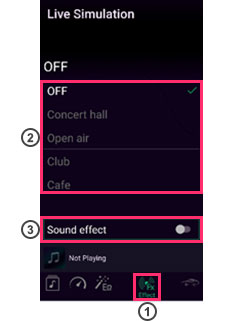
Effect button
Tap to open the Live Simulation screen.Live Simulation selections
Select your favorite venue.Sound Effect
Add applauses to the playing song.
*Sound effect is effective only in smartphone mode. - Processor
-
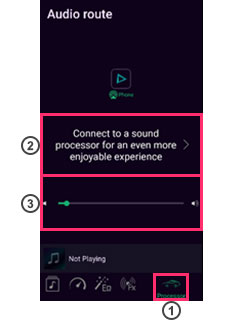
Processor button
Tap to open the processor screen.Processing button
Tap to open the sound processor settings screen.Volume bar
Slide to adjust the volume.
Sound Processor link
Tap to move to the product page of the DEQ-S1000A.Sound processor settings button
Tap to open the processing settings screen. - Processor ( When connected to DEQ-S1000A )
-
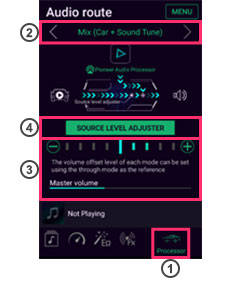


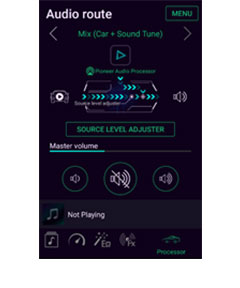
Processor button
Tap to open processor screen.Mode select
Tap to select audio play mode.
Car stereo mode :Play car stereo music via Sound Tune app.
Through mode :Play car stereo music.
*Super "Todoroki" Sound · Live Simulation · 31 BAND EQ cannot be used.
Smartphone mode :Play smartphone music.
Mix mode :Play both music and the navigation voice from your smartphone. *If you use a small screen smartphone, the display will be different.
Source level adjuster
Volume correction for each mode.Select area
Tap to switch Source level adjester and volume.
Menu button
Tap to select "Sound processor settingse","Reset Connection","Switch USB mode" and "Volume limit when processor connection".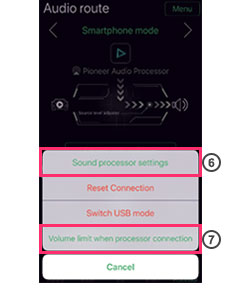
Sound processor settings
Tap to open sound tuning screen.Volume limit when processor connection
This function prevents unintended loud volume when reconnecting with the sound processor.
Enable (default setting): Restrict the volume if there is a loud volume when reconnecting with the sound processor.
Disable: Does not limit the volume.
* Note: If you set to disable, there's possibillity that volume could be loud without your knowledge.
- Car model registration
-
DEQ-1000A
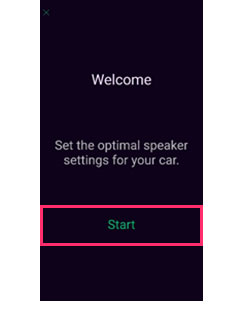
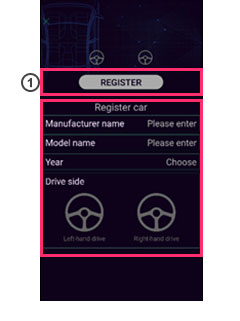
Register button
Register car model information.Settings data :Manage settings data
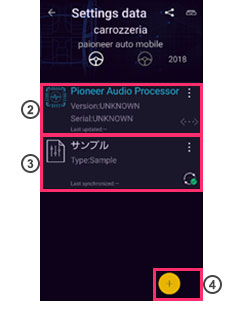
Pioneer Audio Processor
Tap to check and adjust the data currently stored in the DEQ-S1000A.
Editing this data does not save on your smartphone.User created data
Display the data stored in the app
Tap button to reflect the data.
The button turns green when synchronization is complete.Add button
Tap to add new data.
For details, please see "Create settings data".
Settings data registration / adjustment
- Source calibration
-
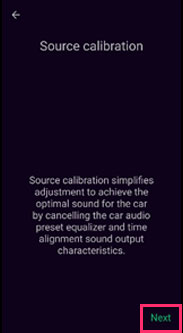
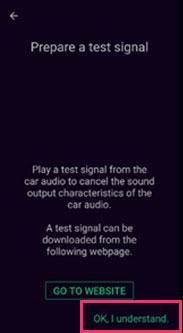
Source calibration :Cancel the tuning setting preset in the car stereo.
*For details, refer to linked page.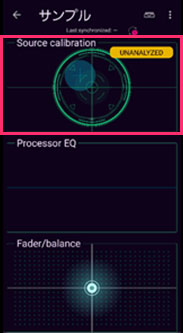






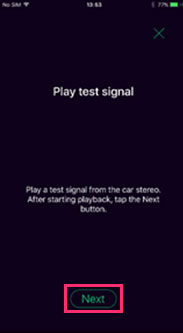


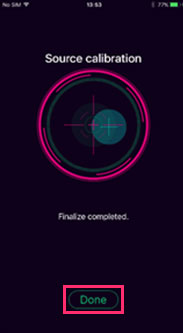
- Processor EQ
-

Tap to open the processor EQ page.

Custom button
Tap to switch between custom A and B.Edit button
Tap to edit EQ.
*For details, refer to "Custom EQ edit screen". - Fader / Balance
-
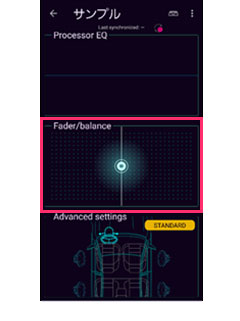
Tap to adjust the Fader / Balance
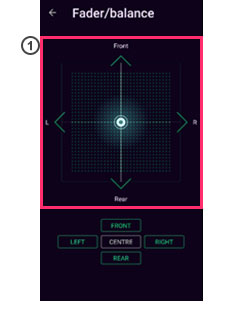 Fader / Balance adjustment areaSlide to adjust Fader / Balance.

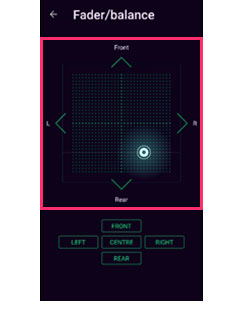
Fader / Balance adjustment area
Slide to adjust Fader / Balance.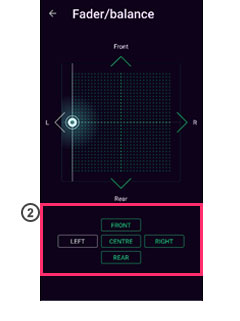
Selection button
Tap to select a preset setting.

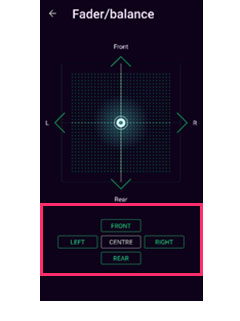
Selection button
Tap to select a preset setting.- Advanced settings
Tap to open the setting screen of Speaker Level, Time Alignment, Cutoff filter and Speaker layout.
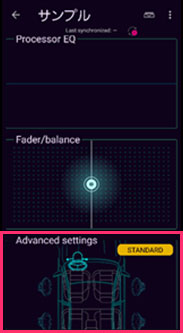
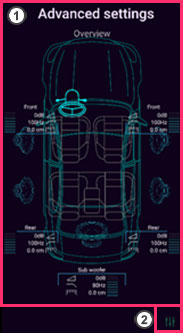
Overview
Information on settings is displayed.Edit button
Tap to open the settings screen of Speaker Level, Time Alignment, Cutoff Filter and Speaker Layout.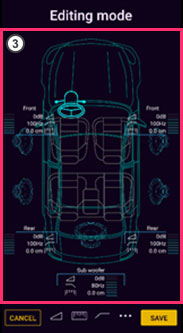
Edit mode
Tap to edit speaker layout.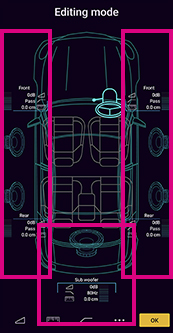
Edit mode
Tap to edit speaker layout.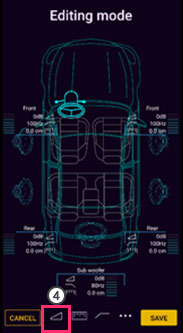
Speaker level button
Tap to open the Speaker levels screen.
Adjust speaker output level.

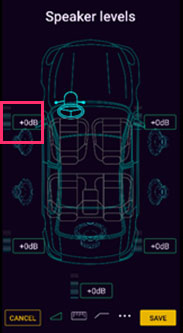


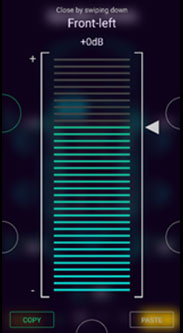


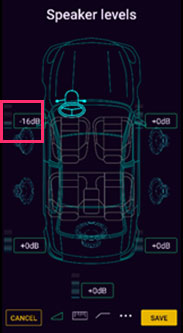
Speaker level button
Tap to open the Speaker levels screen.
Adjust speaker output level.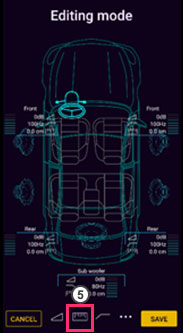
Time alignment button
Tap to open the Time alignment screen.

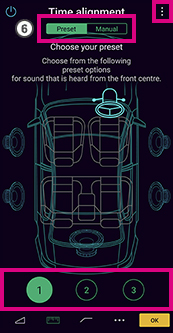 Tap the preset button to select a preset TA.Tap the manual button to set manually.
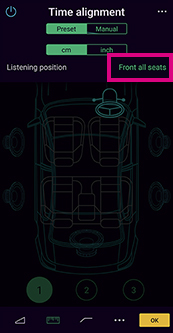
In preset mode, the listening position can be selected in the advanced settings.



Time alignment button
Tap to open the Time alignment screen.
Tap the preset button to select a preset TA.
Tap the manual button to set manually.
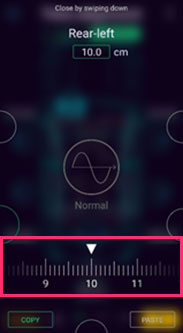
In preset mode, the listening position can be selected in the advanced settings.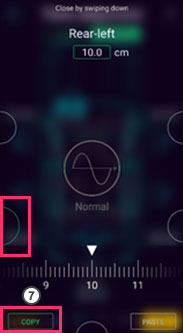 Tap Copy button to copy and then the Paste button to paste settings.

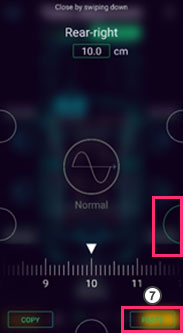
Tap Copy button to copy and then the Paste button to paste settings.

In the subwoofer channel, tap "Normal" "Reverse" to switch the phase.


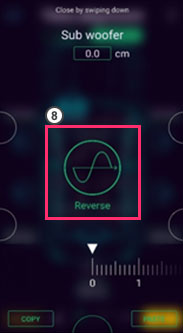


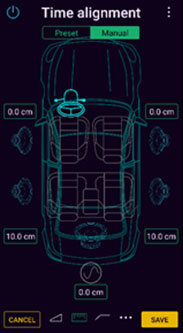
In the subwoofer channel, tap "Normal" "Reverse" to switch the phase.
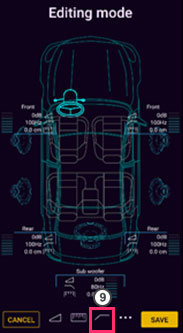
Filter button
Tap to set the Cutoff frequency and slope.

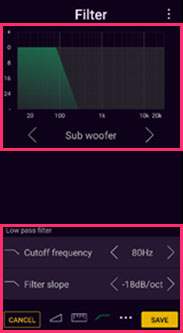


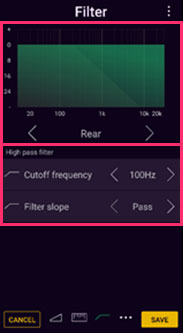


Filter button
Tap to set the Cutoff frequency and slope.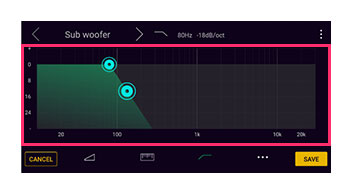 Follow with your finger to adjust.
Cutoff filter supports horizontal screen.


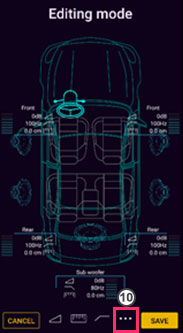
Speaker layout button
Tap to select the speaker layout.

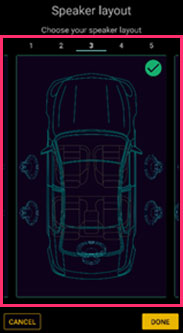


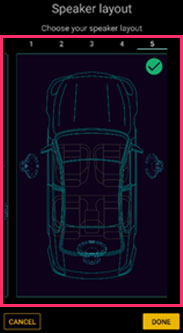
Speaker layout button
Tap to select the speaker layout.- Create Settings data
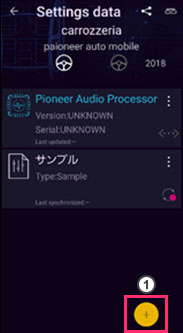
Add button
Tap to create new tuning data.

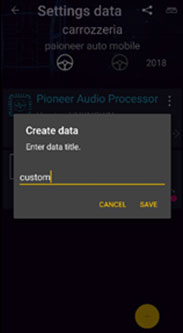


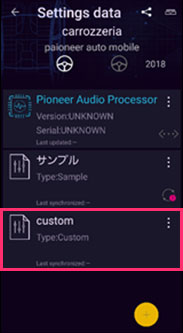
Add button
Tap to create new tuning data.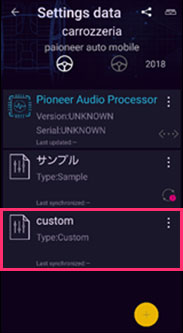
Speaker mode
Tap to select "Standard" or "Network".
*When changing the speaker mode, it is necessary to switch the base unit's speaker mode.
For details, please refer to the instruction manual of the DEQ-1000A.

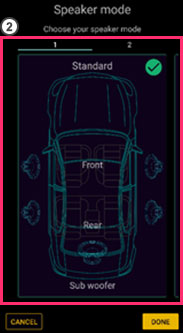
Speaker mode
Tap to select "Standard" or "Network".
*When changing the speaker mode, it is necessary to switch the base unit's speaker mode.
For details, please refer to the instruction manual of the DEQ-1000A.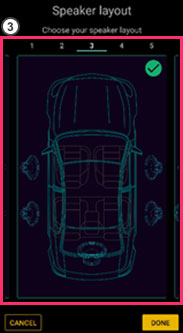
Speaker layout
Tap to select the speaker layout.


Speaker layout
Tap to select the speaker layout.- Registered car model list
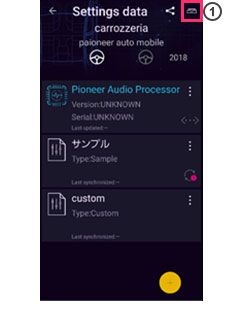
Registered car model list button
Tap to display the registered car model list.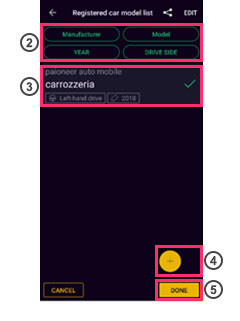
Filter button
Tap "Manufacturer", "Model", "Year", or "Drive side" to display filter.Car model list
List of car model data.Add button
Tap to register new data.Done button
Tap to view the selected vehicle's data.
Edit button
Tap to edit the car model list.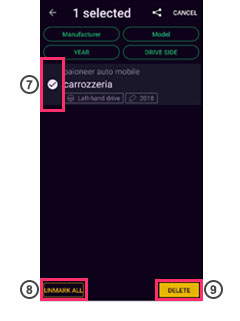
Select button
Tap to select car model.Select all button
Tap to select all.Delete button
Tap to delete the selected car data.- Export
Export the tuning data.
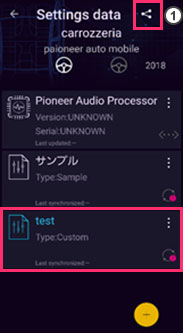
Export button
Tap to open export screen.Export button
Tap to open export screen.

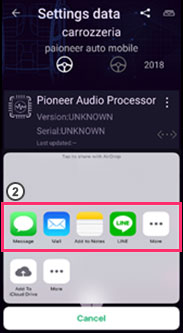
Select tool
Select a tool to export.Select tool
Select a tool to export.


- Import
Import the tuning data
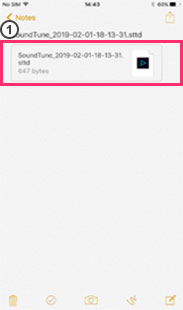
Select the file
Select the file to import.
Select the file
Select the file to import.


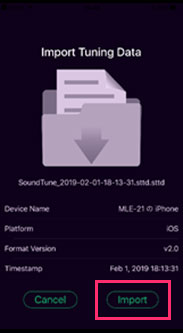
Select Sound Tune app
Select Sound Tune app




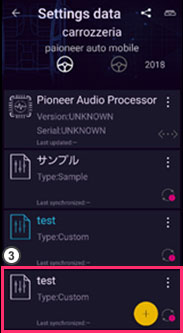
Added to Settings data list on the app
Added to Settings data list on the app


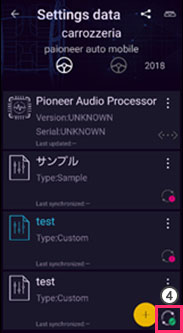
Sync button
Tap to reflect the data to the
DEQ-S1000A.
The button turns green when synchronization is complete.Sync button
Tap to reflect the data to the DEQ-S1000A.
The button turns green when synchronization is complete.
Copyright © 2025 Pioneer Corporation.
All Rights Reserved.

